Engineered by
Precision Surfacing Solutions

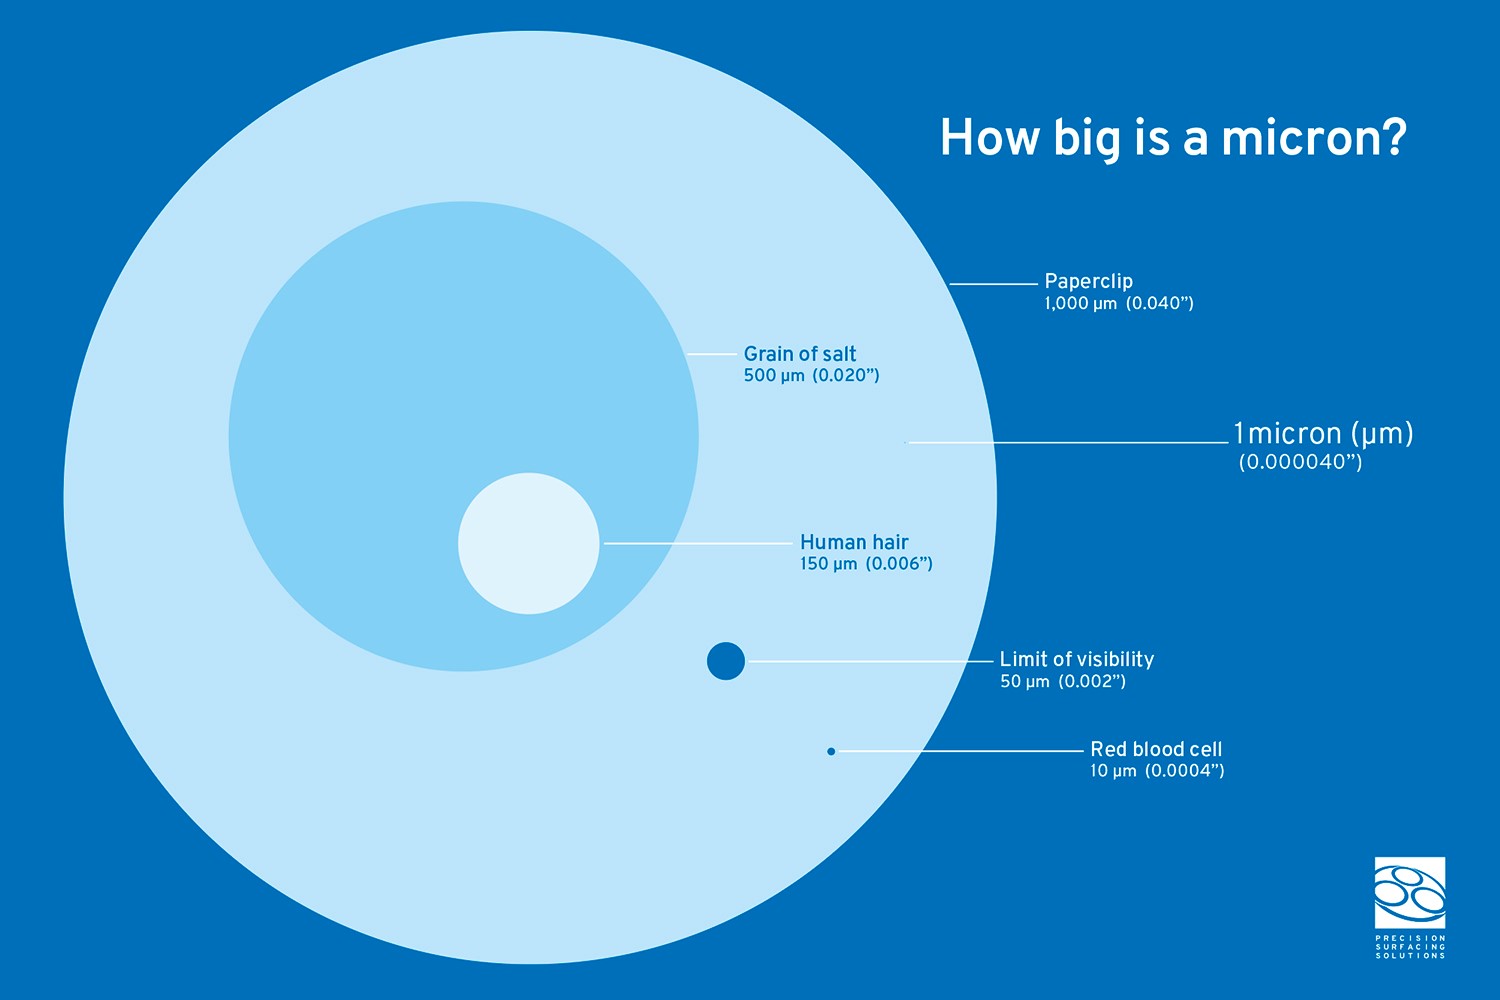
What is a Micron? 

A micron a unit of length equal to one millionth of a meter. 


Performance Capabilities

Because lapping and polishing are considered micro-machining processes used, in general, to produce low surface roughness and precision flatness, this section will limit the subject to the lower limits. This is not to imply that lapping is always performed to obtain low surface roughness and precision flatness. Many applications involve the "clean up" or co-planing of a surface simply to obtain a reference plane for a subsequent manufacturing operation.

Offering firm capability data without the benefit of defining a specific application and processing sample components is impossible. It is very common to obtain a disparity with surface roughness data when comparing two applications where the component material and abrasive used is exactly the same. This is because lapping and polishing processes have many variables that in combination with the component variables cause significant differences in the results obtained.

Lapped Surface Roughness Capability 

In general it is quite achievable to obtain surface roughness of 1 micro-inch (.0254 micron) or less on a dense, hard metal with the use of a very fine aluminum oxide abrasive. This statement is a guideline only or what we would refer to as a “trade show answer”. It is common for trade show attendees to ask performance capability questions without offering any application data.

Units of Measurement Used to Define Flatness

One of the primary purposes of lapping is to machine a surface so that any portion of its two dimensional plane does not deviate in the third dimension further than a specified distance as measured over a specific surface area. A plane is defined in geometry as a two-dimensional surface bordered by three points measured over a specified area. A design engineer can specify the flatness, deviation from the plane, of a surface using one of several alternative terms or units of measurement. The most common terms used to specify flatness in our industry are as follows:

• linear measurement units (ex.: .0000116" or .2946 micron)
• light band = .00001155" (.2934 micron or 2934 angstroms) based on yellow
helium gas light source
= .0000116" (.2946 micron or 2946 angstroms) based on sodium
gas light source
• wave = equals two light bands (ex.: ½ wave = one light band )
• fringe = one light band

As you can see from the examples, it is possible to specify the same measurement number using different terminology. Certain industries have standardized on the use of a term to specify a unit of measurement while other industries use a different term for the same measurement. This is why it is important to be familiar with all the common terms and to be able to routinely calculate conversions.

Flatness Measurement

Flatness can be measured using several different types of equipment. The simplest method would be to use a common dial indicator to measure the deviation distance, high (convex) or low (concave), from the reference plane. The resolution of the dial indicator will determine if this equipment is suitable and accurate enough to be used. Very accurate dial indicators can only resolve .000050" (1.27 microns) units of measurement. If the engineering specification for flatness of the component surface is two light bands a dial indicator does not have the capability to measure the lapped surface.

In our industry it is more common for flatness to be specified in light band units. The only commonly used equipment capable of measuring a light band is an optical flat and interferometer. Both of these devices utilize the physics principle of "Newton's Fringe" which explains the dark band (interference fringe) created by the intersecting (interference) of two diffracting monochromatic light waves.

Inquiry Form

* Indicates A Required Field


Precision Surfacing Solutions family of brands
Precision Surfacing Solutions Wheel BrandPSSLapmasterBarnesISOGElbabaReformKehrenMicronPeter WoltersPrecision Surfacing SolutionsPSSLapmasterBarnesISOGElbabaReformKehrenMicronPeter WoltersLapmaster WoltersPSSLapmasterBarnesISOGElbabaReformKehrenMicronPeter WoltersBarnes HoningPSSLapmasterBarnesISOGElbabaReformKehrenMicronPeter WoltersElb SchliffPSSLapmasterBarnesISOGElbabaReformKehrenMicronPeter WoltersISOGPSSLapmasterBarnesISOGElbabaReformKehrenMicronPeter Woltersaba GrindingPSSLapmasterBarnesISOGElbabaReformKehrenMicronPeter WoltersReformPSSLapmasterBarnesISOGElbabaReformKehrenMicronPeter WoltersKehrenPSSLapmasterBarnesISOGElbabaReformKehrenMicronPeter WoltersMicronPSSLapmasterBarnesISOGElbabaReformKehrenMicronPeter WoltersPeter WoltersPSSLapmasterBarnesISOGElbabaReformKehrenMicronPeter Wolters
  • PRECISION SURFACING SOLUTIONS

    PRECISION SURFACING SOLUTIONS supports manufacturers in a wide variety of industries in which precision grinding, lapping, polishing, deburring and advanced materials processing equipment is commonly used. They all need high-quality, high-precision, stable and well-engineered machines to manufacture high-quality work pieces.

    Visit Site
  • Lapmaster Wolters

    Founded in Chicago in 1948 as a manufacture of lapping and polishing machines for the mechanical seal market, Lapmaster has grown to a worldwide solution provider for more than 20 industries like precision optics and advanced materials.

    Visit Site
  • Barnes Honing

    Since 1907 Barnes has been considered a world leader in developing innovative honing and bore finishing technology and processes. The earliest Barnes honing machines were the first to make honing a practical and efficient means of finishing automotive cylinder bores in a production environment.

    Visit Site
  • ISOG

    Since May 2020, the brand ISOG belongs to the globally active Precision Surfacing Solutions Group. With the addition of ISOG to the already existing strong brands within the Group, PSS further strengthens its position as a leading supplier of high quality, best in class technologies in the market of surface quality enhancement solutions.

    Visit Site
  • ELB-Schliff

    ELB-Schliff Werkzeugmaschinen GmbH has been producing surface and profile grinding machines for over 70 years. The company was founded by Edmund Lang in the city of Babenhausen which led to the name "ELB-Schliff".

    Visit Site
  • aba Grinding

    The aba company was founded in 1898 under the name "Messwerkzeugfabrik Alig & Baumgärtel Aschaffenburg", hence the initials aba. Today, the aba Grinding Technologies is exclusively focused on the advancement and production of precision surface and profile grinding machines.

    Visit Site
  • REFORM

    REFORM Grinding Technology GmbH is specialized in the sales, development & production of grinding machines for various applications at its location in Aschaffenburg (Germany).

    Visit Site
  • KEHREN

    Founded in 1934, KEHREN is a well-established designer and builder of high-precision grinding machine tools and systems under the following categories: vertical grinding centers, vertical grinding centers with portal design, surface grinders with rotary tables and horizontal spindles, and surface grinders with dual rotary tables and vertical spindles.

    Visit Site
  • Micron

    Produced in Germany since 2009, MICRON machines are compact and dynamically rigid grinding machines especially designed for Creep Feed and Profile grinding. MICRON is an industry leader in grinding of Hydraulic components like stators, rotors and van pumps.

    Visit Site
  • Peter Wolters

    Founded in Germany in 1804 by Mr. Peter Wolters, Peter Wolters has been producing lapping, polishing and fine grinding equipment since 1936. In 2019 Precision Surfacing Solutions acquired the division Wafer plant and service business for photovoltaic and special materials of Meyer Burger. Further Information can be found at www.precision-surface.ch

    Visit Site